How to Adjust Veterinary Ultrasound Images for Optimal Results
Veterinary ultrasound is an indispensable diagnostic tool on any livestock farm. Whether checking reproductive health in cattle or assessing tendon damage in horses, we rely heavily on the clarity and precision of ultrasound images to make informed decisions. But no matter how advanced an ultrasound machine is, its value depends largely on how well the images are adjusted and interpreted.
In my daily work managing a livestock farm, I’ve come to realize that fine-tuning the ultrasound image is not just about pushing buttons—it’s about understanding the system behind the screen. Below, I’ll walk you through how image adjustment works in veterinary ultrasound, how it impacts diagnostics, and why every vet or technician should get comfortable with these settings.
The Two Layers of Image Adjustment in Veterinary Ultrasound
The process of adjusting an ultrasound image can be broadly divided into two layers:
-
Software-based control (upper-level application)
-
Hardware-based processing (low-level system)
In practical terms, this means some functions—like freezing a frame, playing back a short video loop, or changing how the image looks on the screen—are handled by the main computer interface. Meanwhile, adjustments that influence how the image is generated (like gain, dynamic range, or zoom) are managed at the hardware level. After tweaking the settings on the control panel, the ultrasound system passes those values to the internal hardware that actually processes the data and alters the image accordingly.
This dual-system design is key to maintaining both real-time performance and flexibility in image quality.
Why Image Adjustment Matters
Not all veterinarians interpret images the same way. Some prefer darker grayscale images because they reveal certain structures more clearly. Others like brighter, high-contrast images. A high-quality ultrasound system should accommodate both preferences.
In our experience, the difference between a good scan and a bad one often comes down to how well the image is adjusted. This includes not just brightness and contrast, but also factors like:
-
Dynamic range: This controls how many shades of gray are displayed, affecting the visibility of soft tissues.
-
Smoothing algorithms: These help reduce graininess or noise in the image, which can make borders and organ contours easier to interpret.
-
Zoom and magnification: Critical for focusing on smaller structures like follicles or tendon tears without sacrificing resolution.
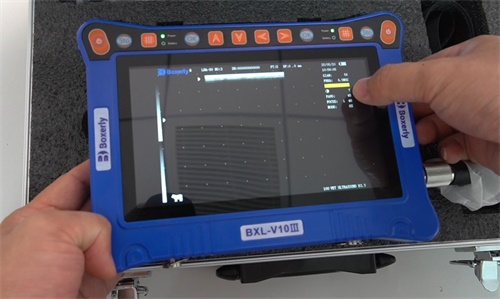
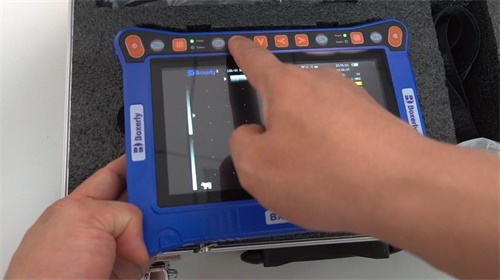
Adjusting Image Display: Window Width and Window Level
One of the most effective ways to improve image clarity is by adjusting the window width and window level. These parameters control the range and midpoint of grayscale displayed on the monitor, much like editing the brightness and contrast of a photograph.
In our ultrasound practice, when we retrieve image data from the system’s memory buffer, the raw grayscale values often appear dull or overly compressed. This makes it hard to distinguish between soft tissues of similar density. By adjusting the window width and level, we stretch the grayscale range, improving contrast and making key structures pop out.
This process does not alter the raw data—only the way it’s displayed. It allows us to experiment with the image without risking any loss of diagnostic information.
Addressing Low Contrast and Echo Confusion
A common challenge is when grayscale values in the image are too tightly grouped, resulting in low contrast. This can make it nearly impossible to identify structures like uterine horns, fetal skulls, or inflamed ligaments.
In such cases, I always begin by adjusting the window settings. If that doesn’t work, I try increasing the overall gain or reducing the dynamic range, depending on whether I need more brightness or clearer separation between tissue types.
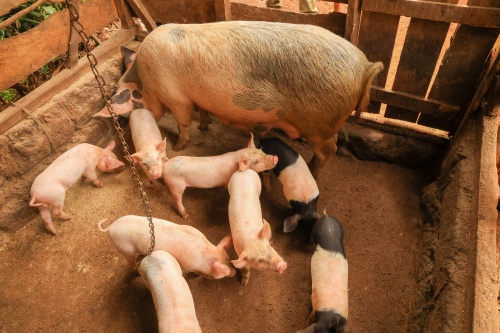
Interestingly, the same techniques are useful whether I’m scanning pigs, cows, or horses—though I might have to tweak them depending on the species and the target tissue.
Image Orientation: Flipping and Rotating
Another part of image adjustment that is often overlooked is orientation. Many ultrasound systems allow users to flip the image vertically or horizontally. This might sound minor, but getting the image aligned with anatomical expectations is critical for accurate diagnosis.
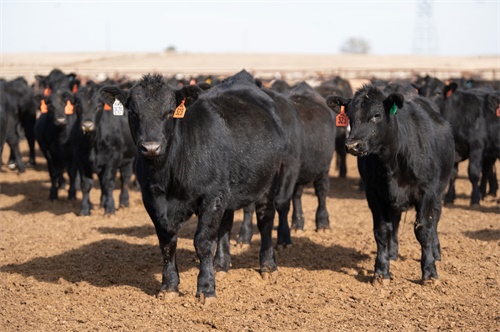
For example, in transrectal ultrasound of cows, having the image flipped incorrectly can lead to misinterpretation of the uterine structure. That’s why our systems are designed with built-in functions that allow flipping or rotating the image to match the anatomical direction we’re expecting to see.
The Role of the Technician: Image Adjustment as a Skill
A powerful ultrasound machine is only as good as its operator. I’ve trained multiple technicians on my farm, and I always emphasize that learning image adjustment is just as important as understanding anatomy.
Good technicians recognize poor contrast or echo dropout and immediately know how to fix it. Whether it’s tweaking the focal zone, switching transducers, or applying more gel for better coupling, these small actions add up to much better diagnostic performance.

How Adjustment Settings Affect Clinical Outcomes
Imagine trying to detect early-stage mastitis or uterine infection in a sow or a cow. Without optimal image adjustment, those subtle changes in tissue texture or echogenicity can be missed entirely. Conversely, well-adjusted images can help you spot abnormalities early, reducing the need for more invasive procedures.
In reproduction, being able to clearly see the follicles, corpora lutea, or fetal heartbeat makes a huge difference in planning breeding schedules or deciding whether intervention is needed.
My Workflow When Scanning
Here’s how I usually approach an ultrasound scan on the farm:
-
Initial Scan – Begin with default settings and observe general structure.
-
Adjust Gain and Depth – Tailor brightness and focus depth for the target area.
-
Window Width/Level – Fine-tune grayscale contrast to bring out detail.
-
Zoom In – Focus on any structure of interest, like a fetal sac or tendon lesion.
-
Flip/Rotate if Needed – Align image with anatomical expectations.
-
Freeze and Save – Capture clean, interpretable frames for later review or record.
Conclusion
Understanding how to adjust veterinary ultrasound images is not just for engineers—it’s a vital part of the diagnostic process on any livestock farm. From window settings to orientation, each small tweak helps paint a clearer picture inside the animal, leading to faster decisions and better care.
The more we understand and control our imaging environment, the more effective we become as caretakers of our animals’ health. In veterinary medicine, especially in large-animal practice, mastering ultrasound image adjustment is no longer optional—it’s essential.
References
-
Penninck, D., & d’Anjou, M.-A. (2015). Atlas of Small Animal Ultrasonography. Wiley-Blackwell.
-
Butler, J. A., Colles, C. M. (2009). Clinical Radiology of the Horse. Wiley-Blackwell.